If for some reason I got put on death row, it would be for stealing all the cheesecake and then eating it. Said cheesecake would also be my requested last meal. That’s how much I love it. I’m not kidding.
I actually love cheesecake so much that I don’t make it and eat it very often because I’m afraid that I may get sick of it and not like it anymore. It’s a vicious cycle, really, of cream cheese-scented nightmares and graham cracker-crust reveries.
But when holidays like Thanksgiving come along, all rules are thrown out the window. This time around, I was assigned (along with the four other desserts already on my menu) to create something gluten-free, and whaddya know, cheesecake fits that description rather well.
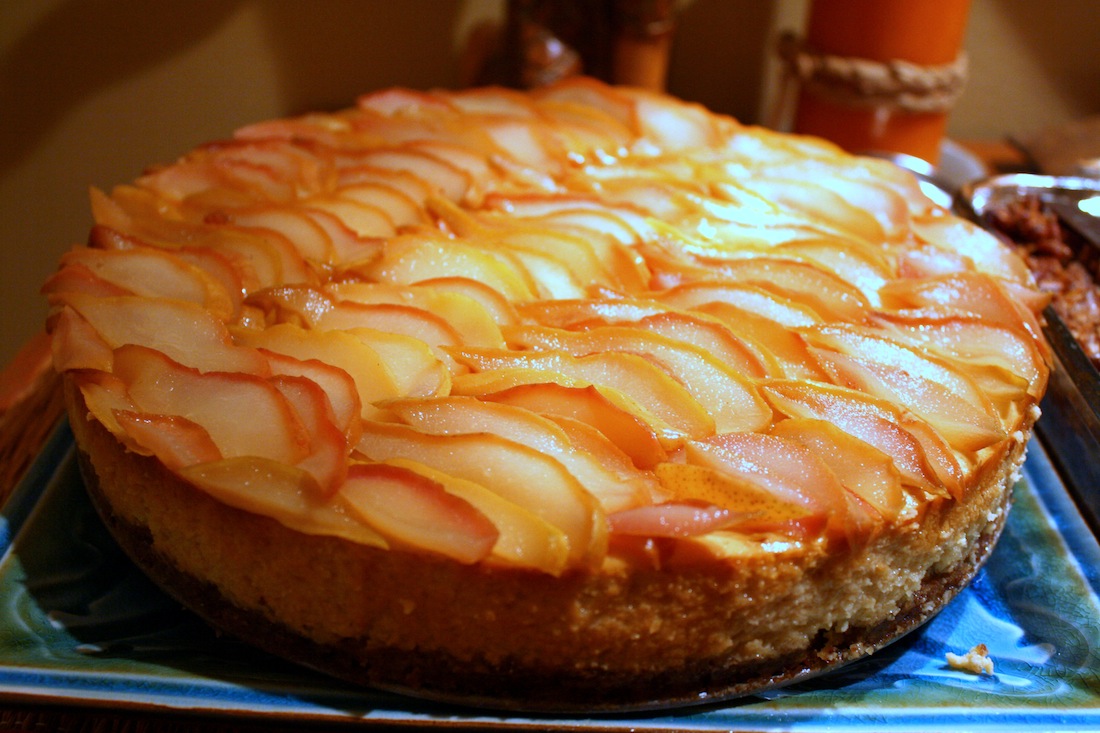
In general, cheesecake is nearly completely gluten-free except for the crust, which I made using this recipe. In the spirit of fall, I squished together a few other recipes floating around on the interwebz and baked up a maple-sweetened version topped with maple-roasted pears.
Normally, I make do with a cheaper imposter of maple syrup because money don’t grow on trees. However, for this recipe, I’d recommend going full baller status and using some Canadian, Grade A syrup because it will change your life, and if there is any time to ball out, the holidays are it.
Stick ‘em up.

Gluten-Free Maple-Pear Cheesecake
[ingredients]
Directions
- Preheat oven to 300 degrees.
- In a heavy medium saucepan, boil maple syup over medium-high heat until reduced to 1 cup, about 5 minutes. Remove from heat and let cool to almost room temperature.
- In the bowl of stand mixer, beat cream cheese and sugar until very smooth. Add flour, salt and mix. Then add the reduced maple syrup, sour cream, and vanilla extract.
- Add in the eggs 1 at a time, mixing well after each addition. Pour into the cooled crust and tap the sides vigorously to release any air bubbles.
- Bake for 1 hour and 40 minutes until the top is evenly browned and the center is barely jiggly. Let cool completely at room temperature, then refrigerate overnight.
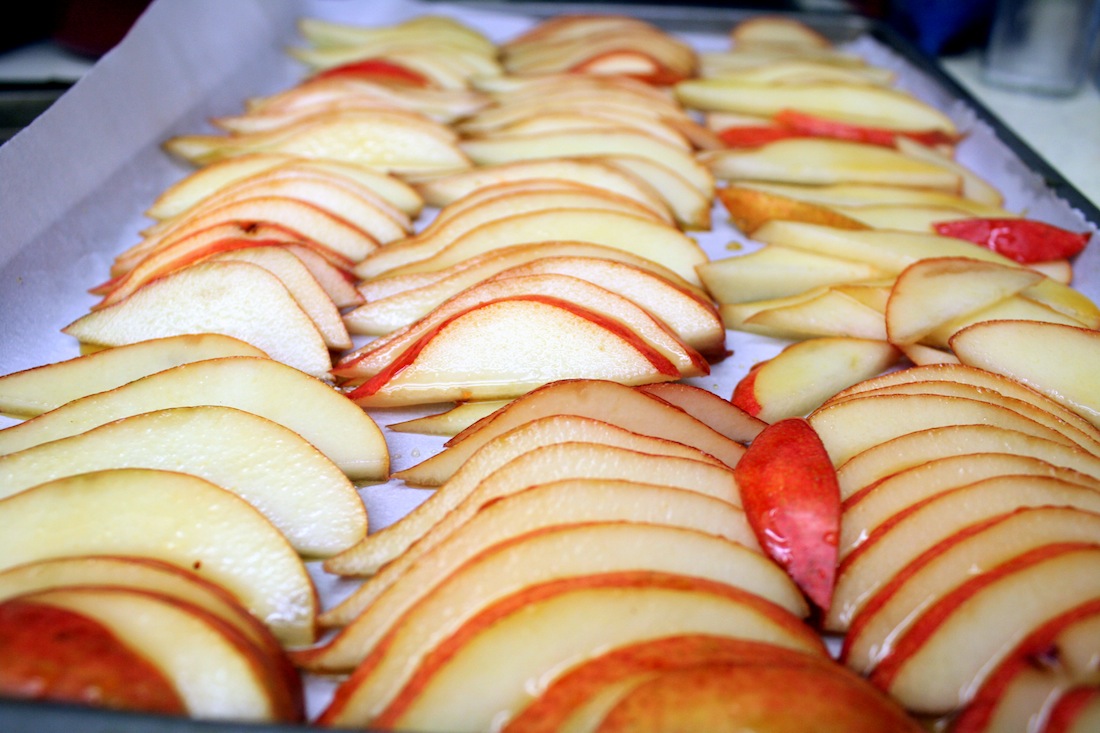
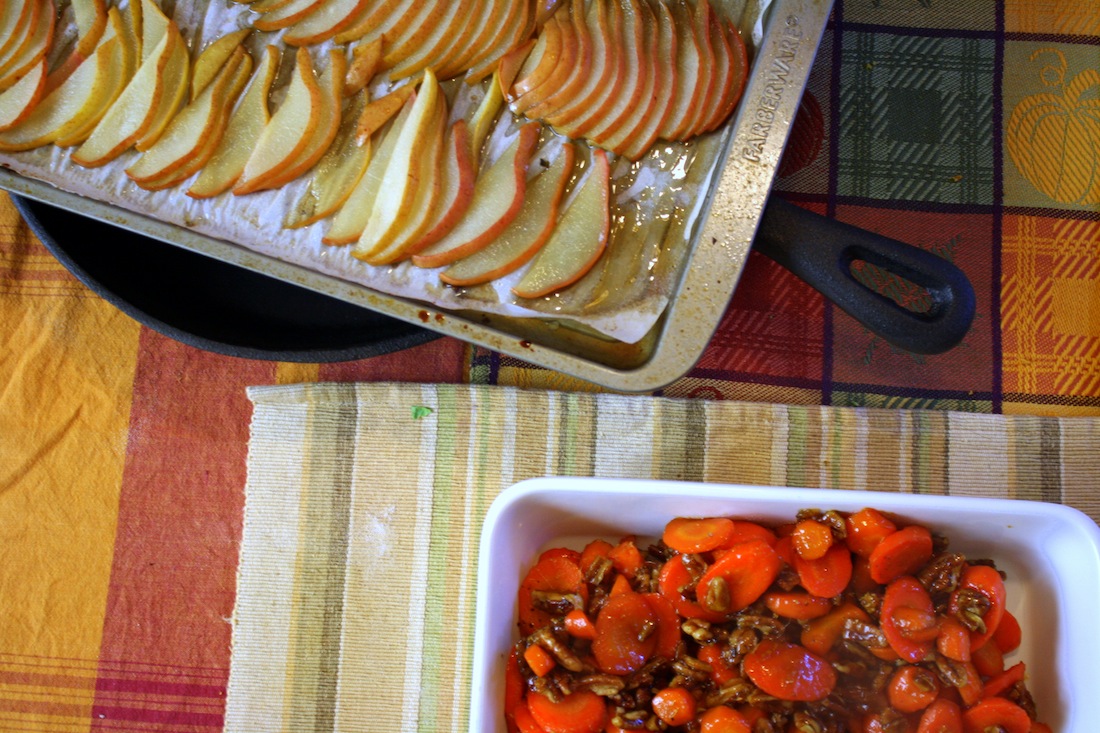
- For the pears: Preheat the oven to 450 degrees and line a baking sheet with a Silpat or parchment paper.
- Arrange the slices evenly on the baking sheet and brush liberally with maple syrup. Roast until the pears are soft, about 20 minutes. Let cool to room temperature.
- Before serving, arrange roasted pears on top of the chilled cheesecake, overlapping the slices to fit.
Oh my GOSH I want to come to your Thanksgiving!!!! That dessert table looks 20384029834x more appealing now that I know that’s pear cheesecake on the end!! Ummm breakfast cheesecake for brunch? 😉
Hahaha is breakfast cheesecake a thing? If not, let’s just make it a thing. It’s brunch, so anything goes!
Oh I so tempted now! Your cheesecake looks very very beautiful, divine, I’d say! I look forward to buying a beautiful bottle of Canadian maple syrup!
The pears by themselves are a dessert…..
They really are. Does this mean that this cheesecake is really two desserts?!
Oooh, look at all those lovely ripples of juicy pear slices. Now, this is the way I want to get my fruit in the winter. LOL Can you blame me?
I wouldn’t want my fruit in any other way!
A good naturally GF dessert is definitely the way to go if you’re baking to please a crowd! Love the sound of this!!
Thanks Joanne! It’s so delicious, I might make another version of it for Christmas!
This is such a beautiful cheesecake, the pears on top look perfect!
Thank you so much! It was definitely fun to make.
The ingredient list on this recipe seems to be missing